[Home]    [Photo Gallery]   [Car & Loco Mods]   [Interlocking]

Welcome to my Car & Loco Mods page.  Here you will find modifications to Large Scale Locos and Cars that I have developed, modified, or just stolen from others! The following modifications are presented on this page: 

Track Weathering Tutorial

Bachmann Annie Power Mod

Bachmann Coupler Mod

Adding R/C to the Accucraft Open Cab Shay

Check back often as more will be added as they become available.

Track Weathering Tutorial - Marty Cozad's simple method to quickly and effectively weather your track.
I love Aristo Craft's Stainless Steel rail, it's a breeze to keep clean with only a quick wipe with a terrycloth pad. It looks better than yellow brass rail, but it still doesn't look right with bright sides. Fortunately there is a fast and simple method to weather the track to make it look much more realistic.

I can't remember when Marty last posted his method on myLargescale.Com, but I have been using it for a while and really like the way the track looks when finished. This method is fast and easy. It can be done before laying track, or after the track is in place.

On each of the following images you may click them for a Super Size image (1024 pixel wide - aprox. 100K)   

The first step is to gather your tools and select a place to work. If you will be painting on a table, cover a large area to protect from over spray. You will need Krylon Ruddy Brown Primer, Krylon Semi-Flat Black, Lacquer Thinner, 1 Inch Masking Tape and the beverage of your choice. The screwdriver is used to open the safety top on the lacquer thinner. If you are working outside and there is any wind at all, be sure to protect or move any valuable items nearby that you don't want to paint, like your car :( There are 5 basic steps to this method...
  • Mask the track
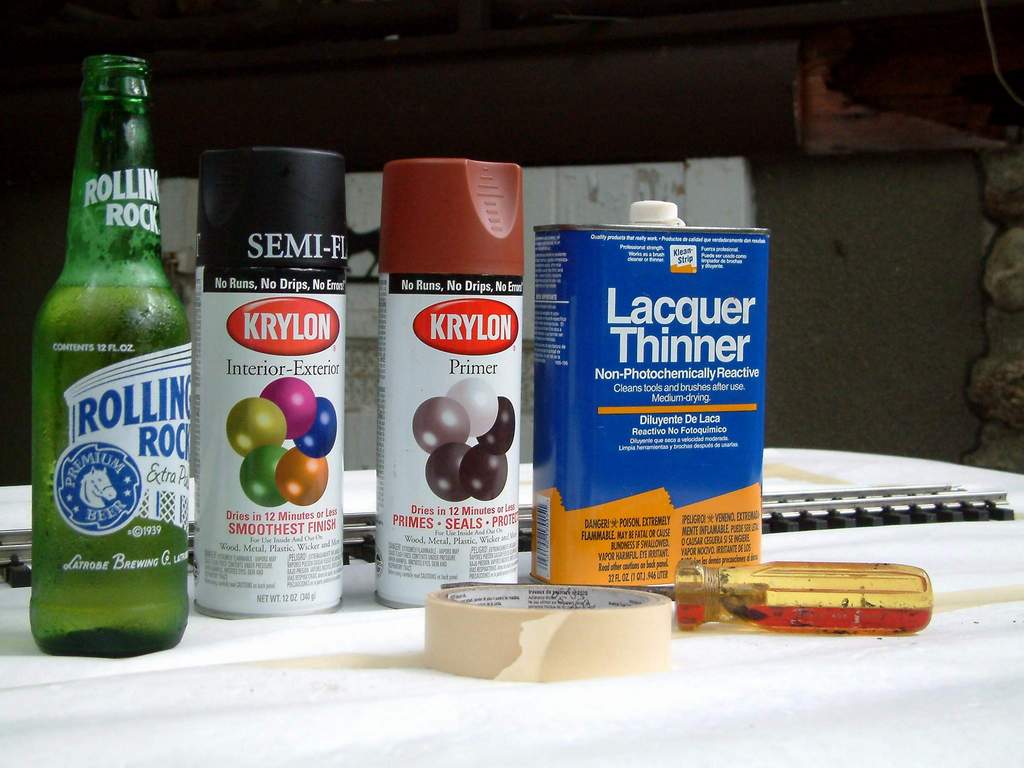
  • Spray on Ruddy Brown Primer
  • Spatter on Semi-Flat Black
  • Remove the masking
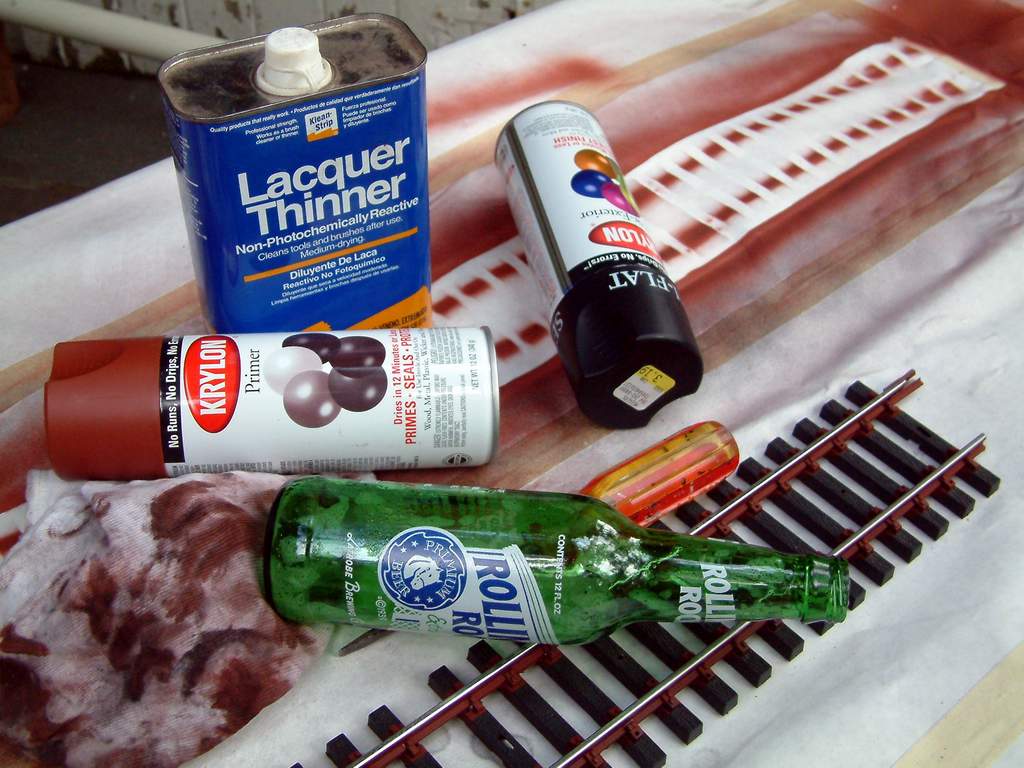
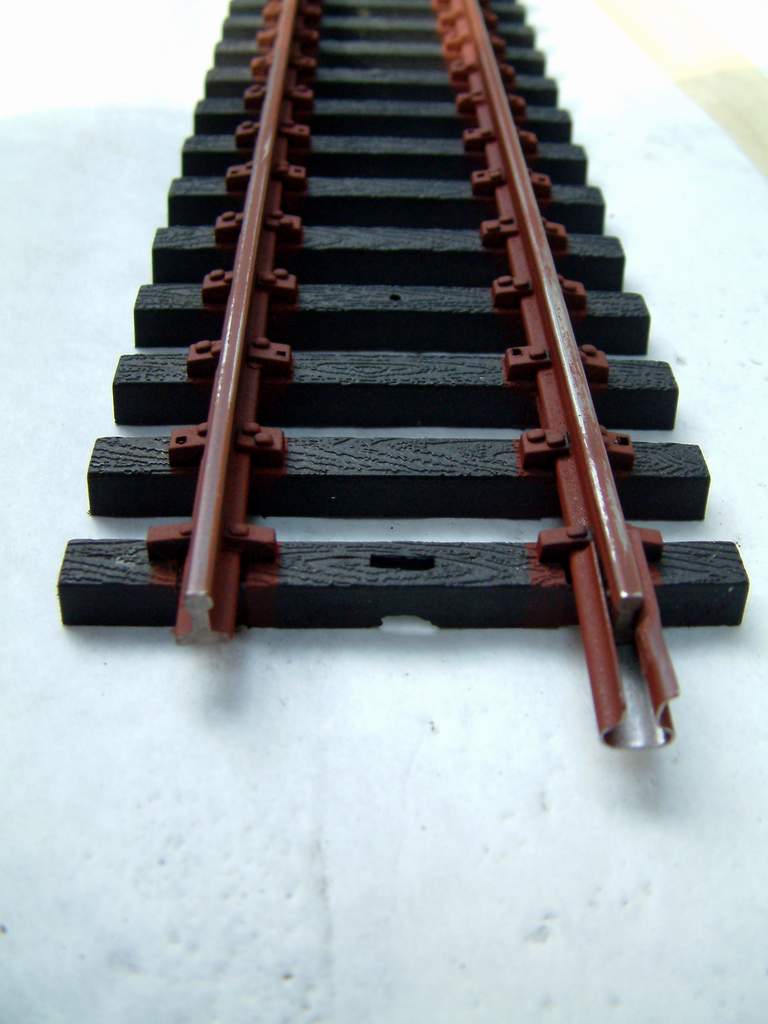
  • Clean the rail tops with Lacquer Thinner
Masking is easiest if you weather prior to laying track.

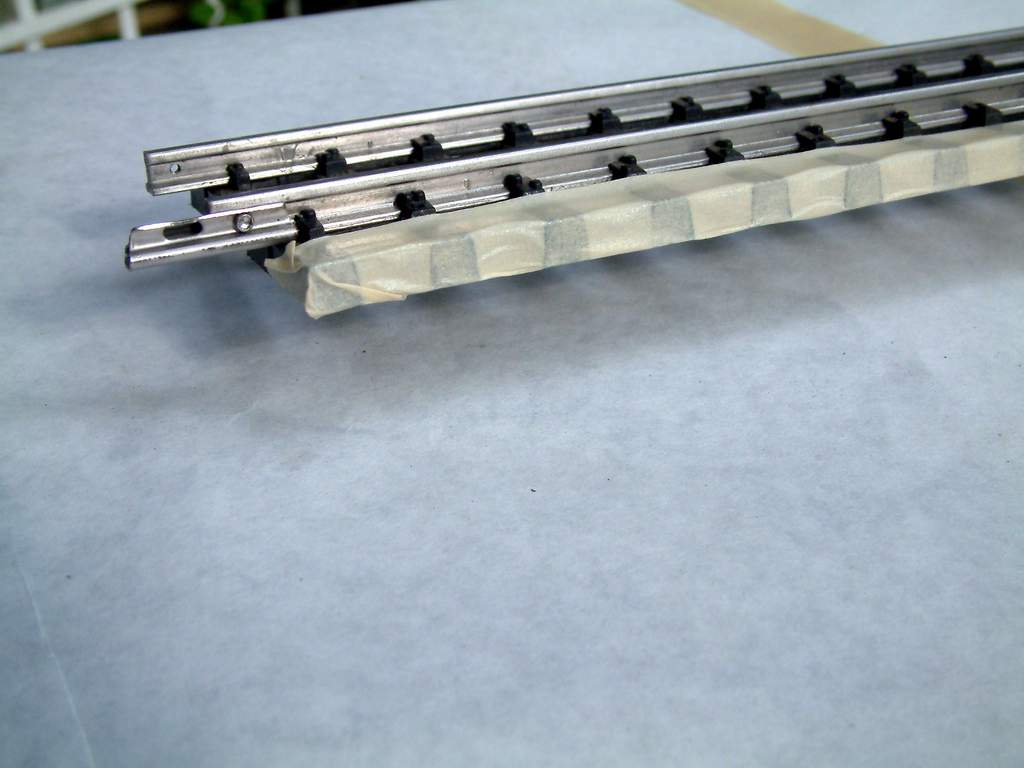
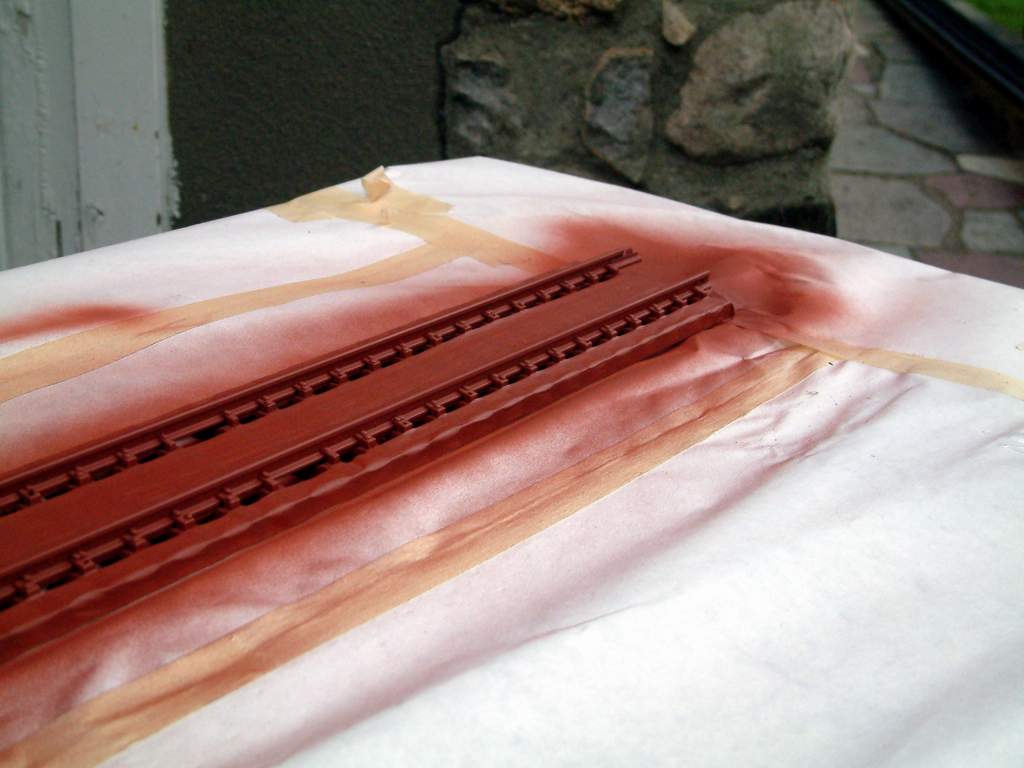
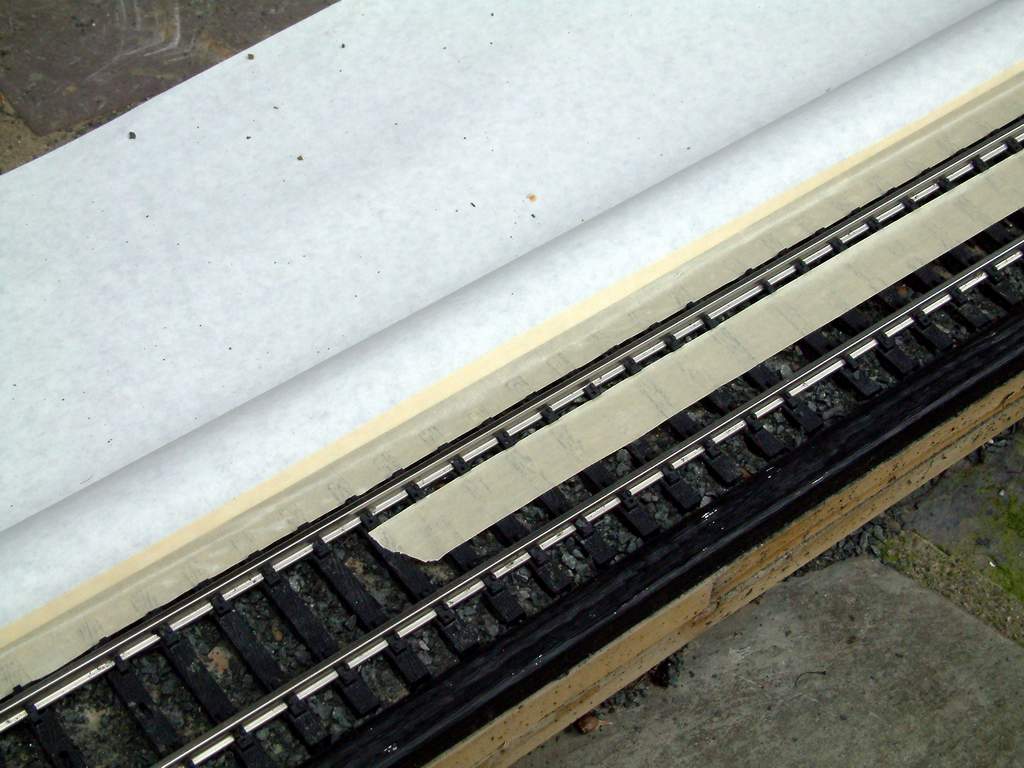
First run a line of tape down the outside of one rail. Butt the tape up tight to the tie plates.

After you have laid the tape down the entire length of the track section, fold it down over the ends of the ties.


Repeat taping outside the rail on the other side.

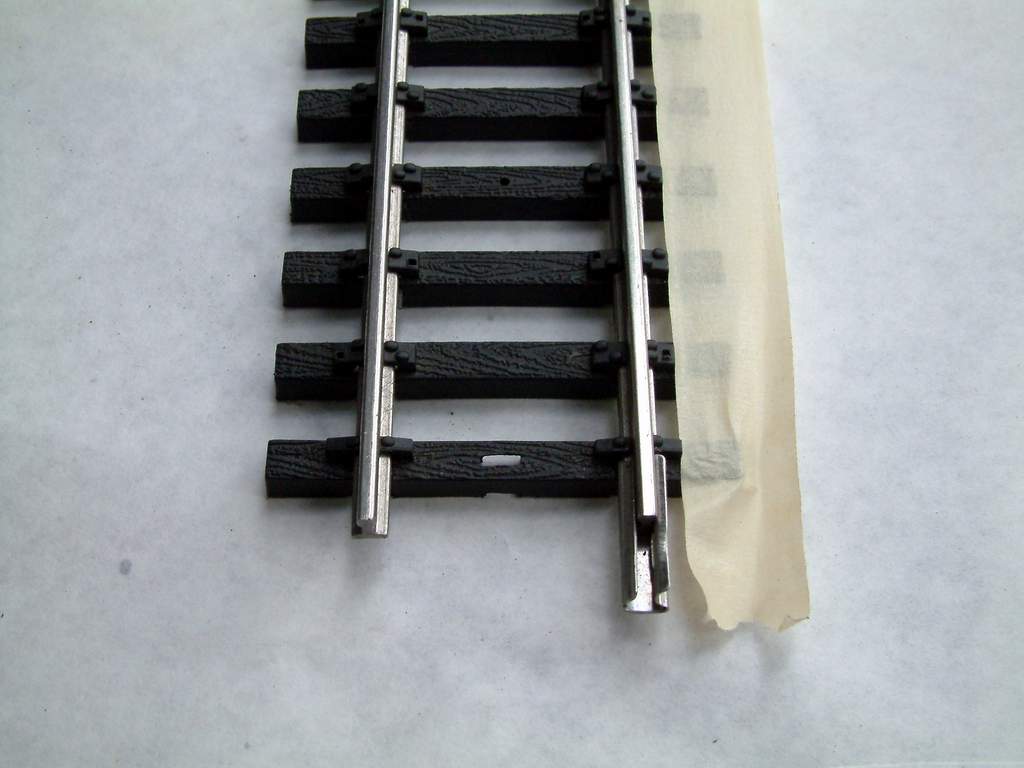
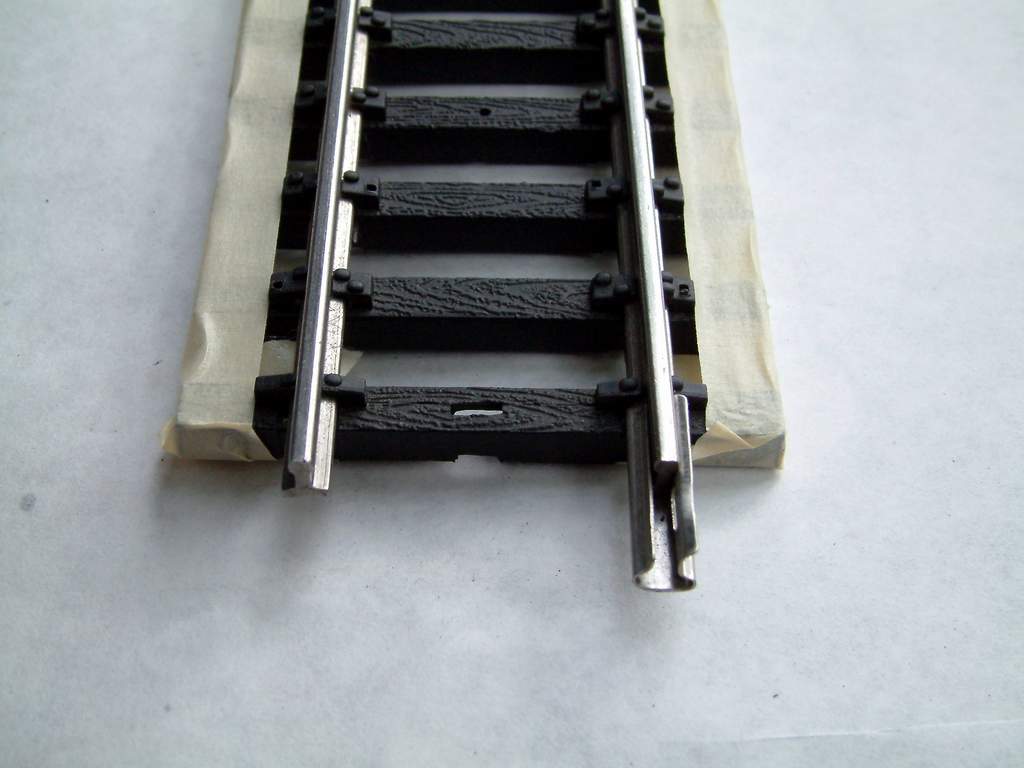
Next run a line of tape down the inside of one  rail, butting the tape tight against the tie plates.

Repeat taping inside the rail on the other side, overlapping the tape in the center.  This completes the masking. Your track should look similar to the picture in the center and is ready to paint.

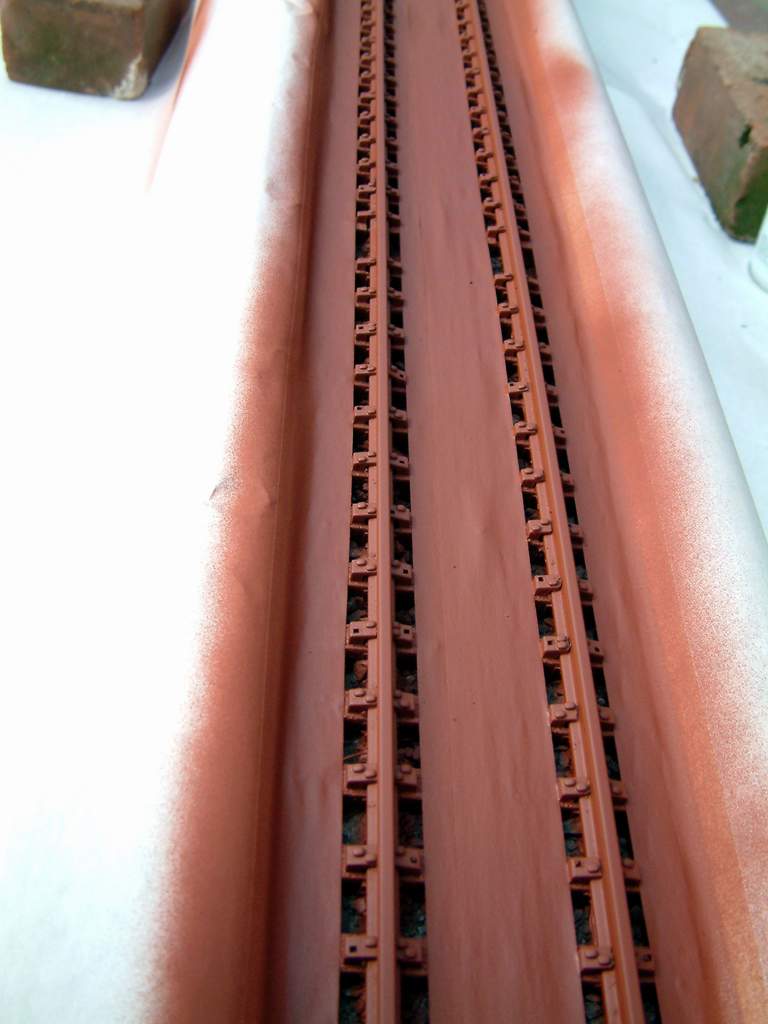
Shake your Ruddy Brown Primer for a few minutes then lay one even coat along the inside of one rail, keeping the can about 8-10 inches from the rail and at a 90 degree angle to the rails. Repeat for the outside rail.

Paint the other side the same way by going to the other side of the track, or turning the track on your table.

One coat might be enough, but I never skimp on paint. After 30 seconds or so I go back and repeat the process for a second coat.

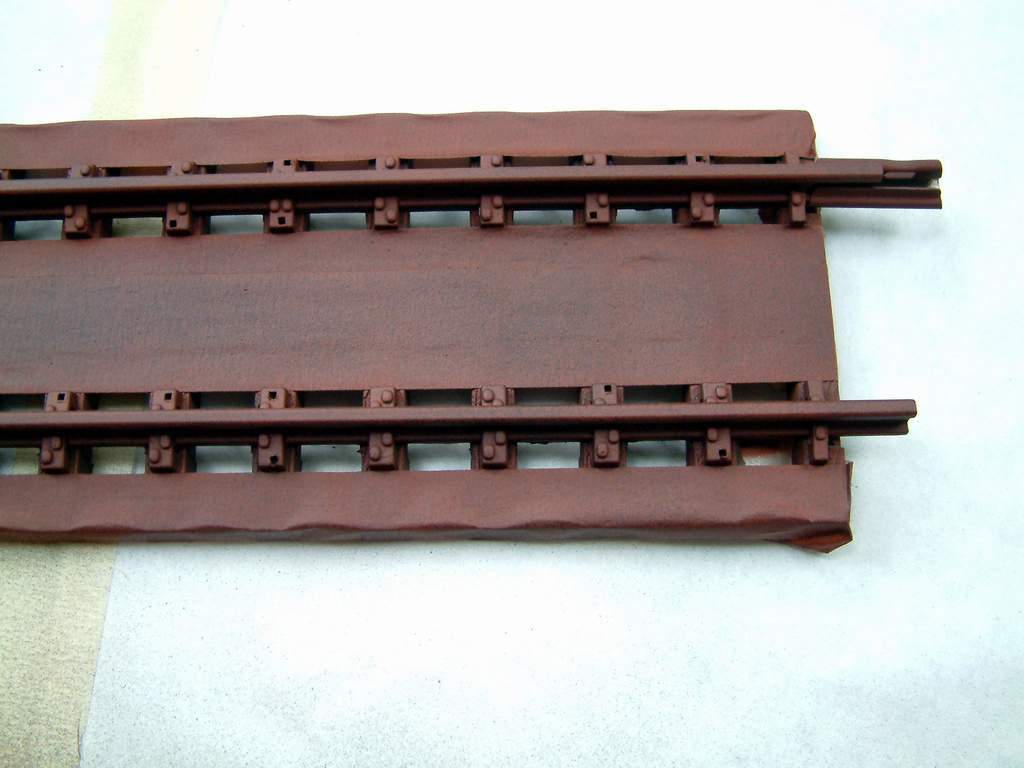
Application of Ruddy Brown Primer is now complete. 

Next, shake your Semi-Flat Black for a few moments and consider wind and other conditions like humidity and temperature. You are trying to achieve a light, slightly dry spattering of black paint over the top of the ruddy brown. You want to darken the primer, but not make the track black.

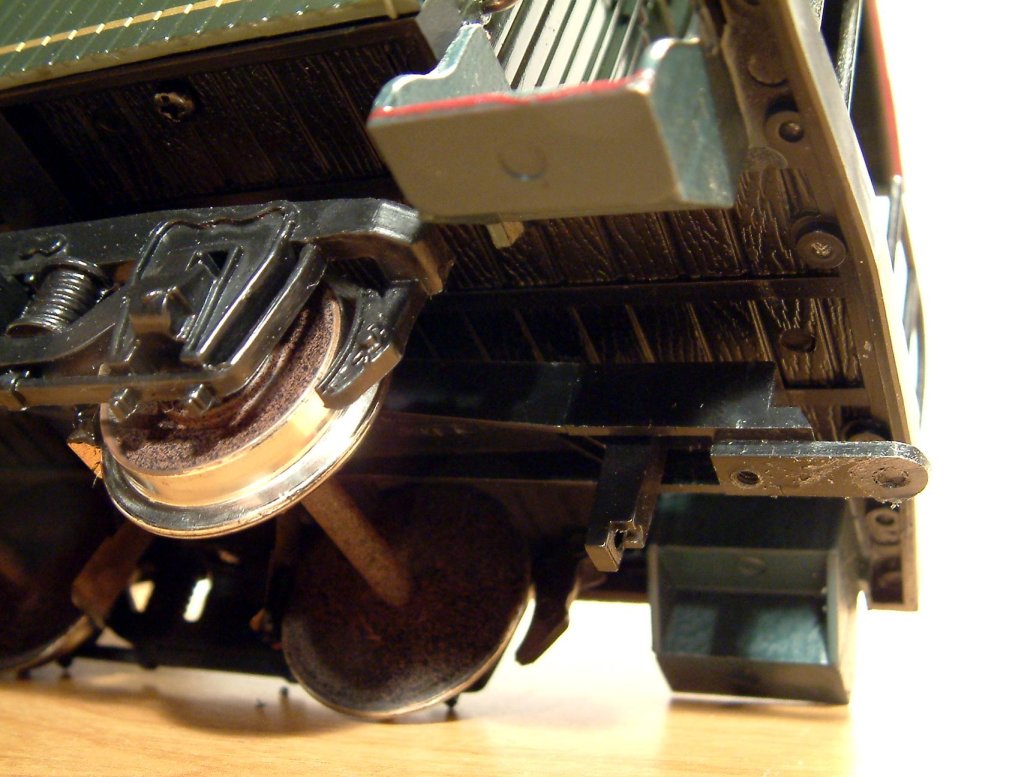
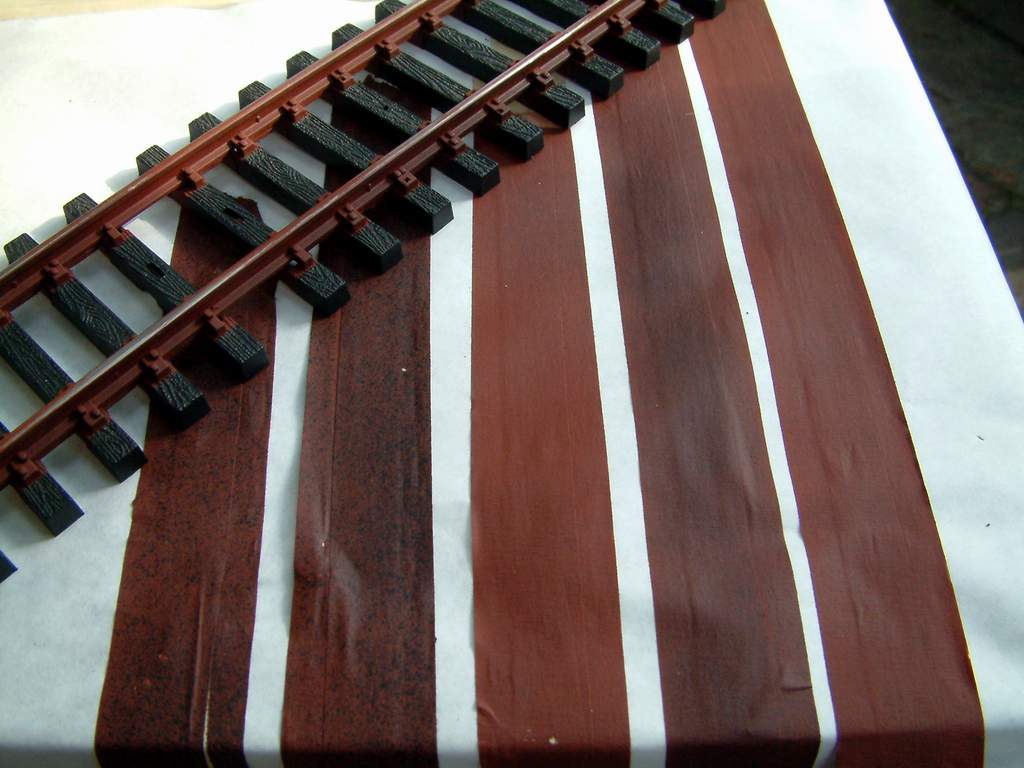
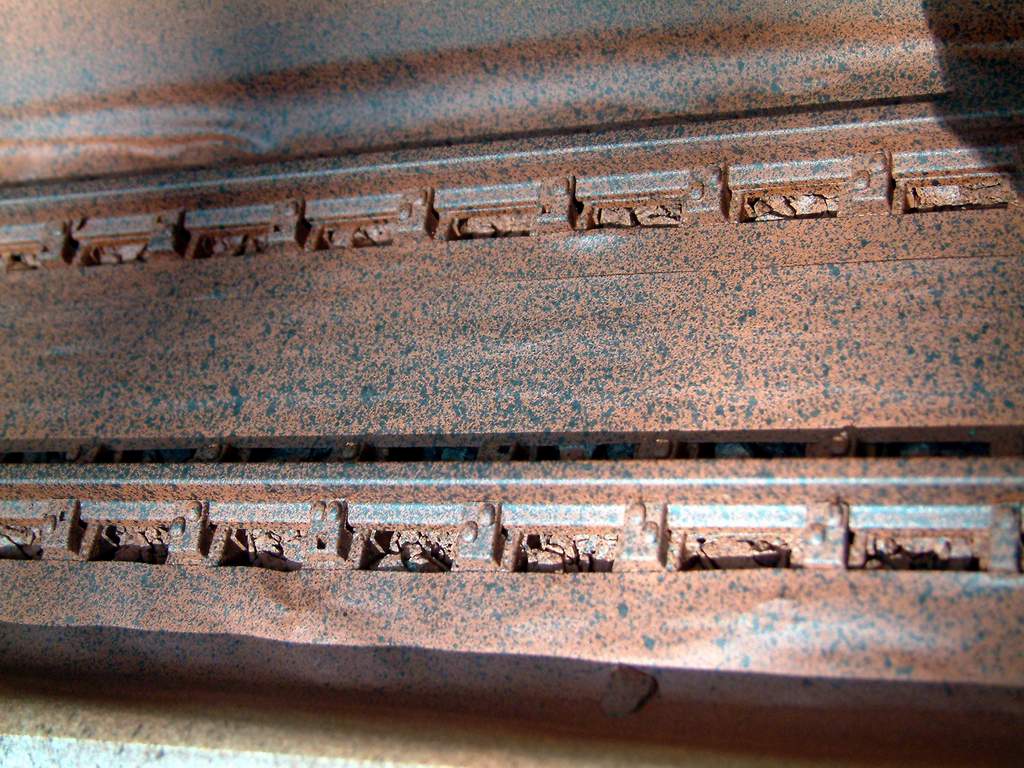
I spray quickly from a distance at least twice normal, like 18-24 inches. Notice that the color is now more brown-like but it still has some oxide color. I sometimes go back and hit it again in short random bursts to simulate oil drips.

It is not important to get an even color. Color can, and should, vary over the length of a section.

Remove the tape soon as the paint is dry to the touch, about 5 minutes.

The next step is to remove the paint from the tops of the rail. Please resist the temptation to use abrasives, especially with Stainless Steel rail.

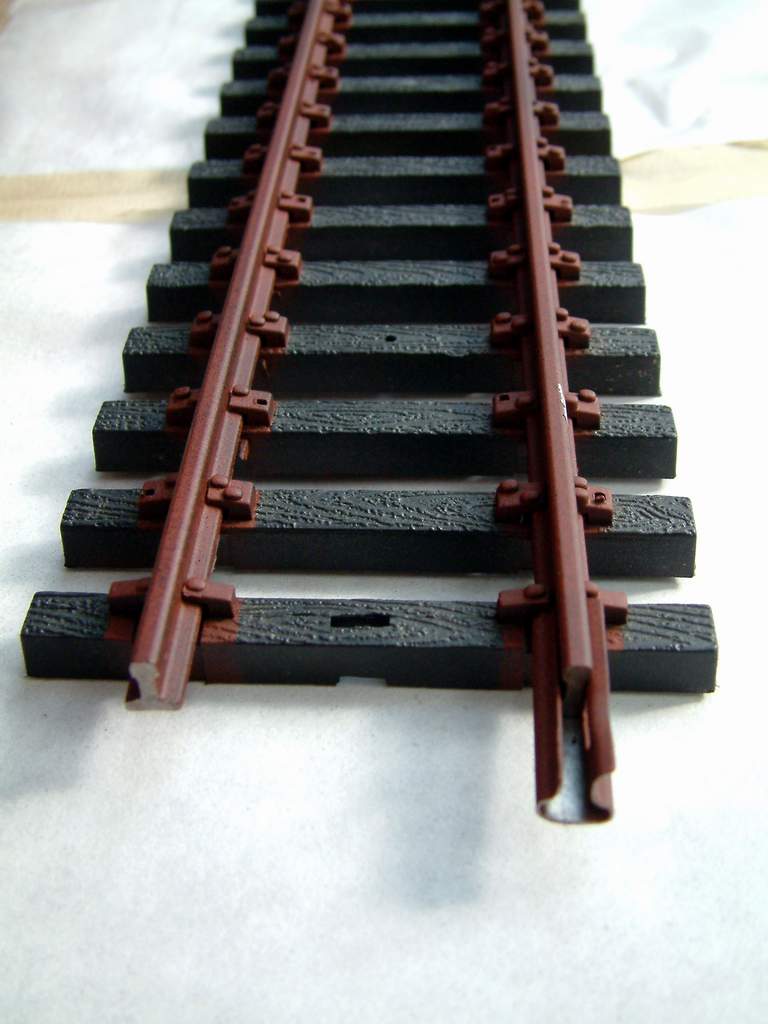
Lacquer Thinner will dissolve Krylon in just a few seconds. Use a cotton cloth and wet it (don't soak) with lacquer thinner. Work in small sections, about 8 inches at a time. Get the rail top wet with thinner and keep rubbing lightly, turning the cloth to a clean spot often. Within a few seconds the paint will dissolve and wipe right off. Don't rub hard and don't scrape. Let the thinner do the work. Wet the cloth again if it is working too slow. Once you get the hang of it, the job goes quickly with very little effort.

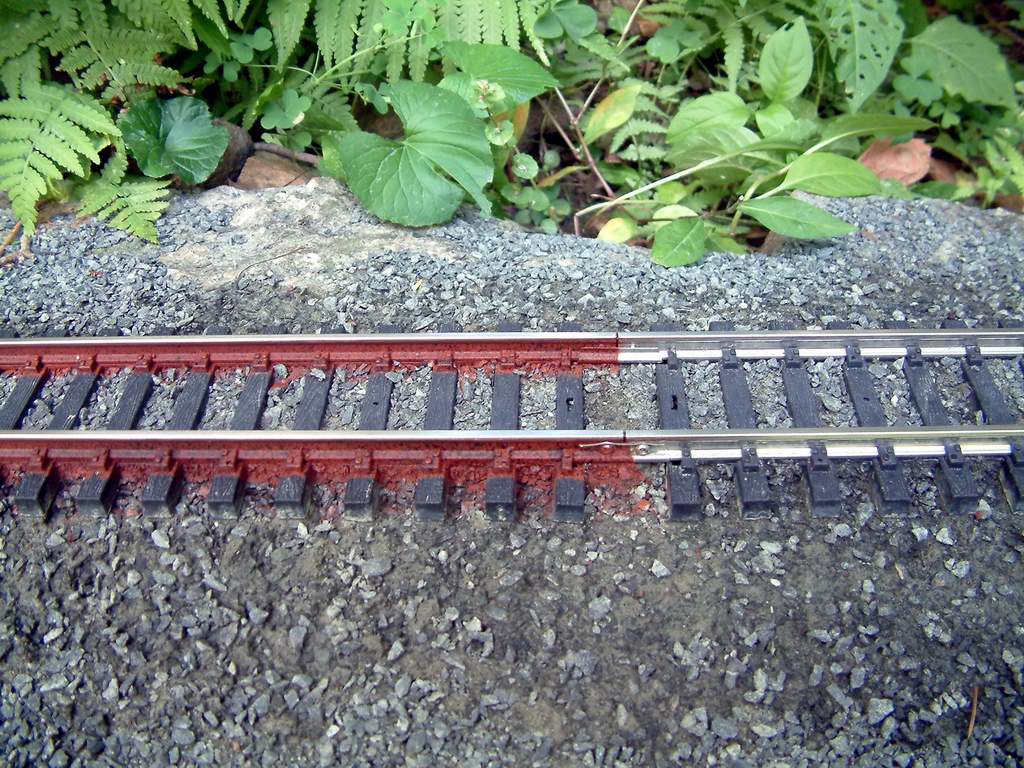
For sidings or "dead" track you may want to leave the tops painted, or only remove some paint as in the photo on the right.

This picture shows how the application of black can have a significant effect on the final color. These 5 strips are the center masking from different parts of a 20 foot section I painted at the same time.

Click the Super-Size link and notice the wide variety of colors you can achieve.

For fun, I keep an old rusty spike handy as a color reference.

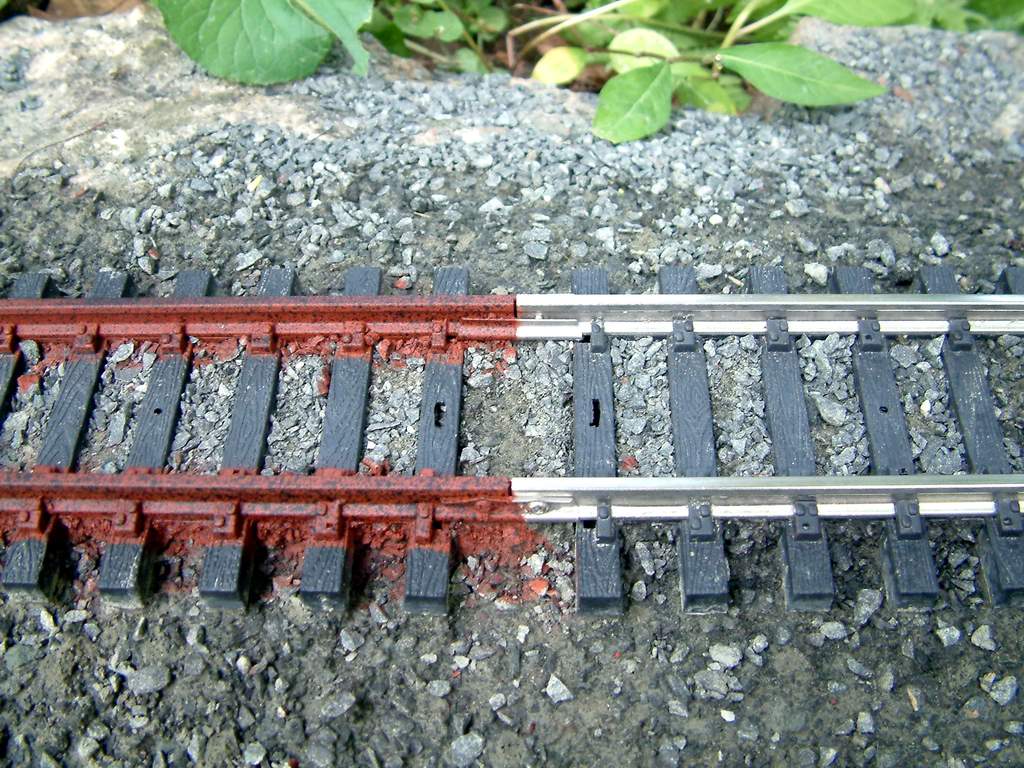
On the right is a before & after comparison. Quite a difference, No?

I decided to weather my track after I hade a little over 100 feet down. I was going to pull it all up, but I need to be in good shape for guests in two weeks, so weathering in-place is my only option.

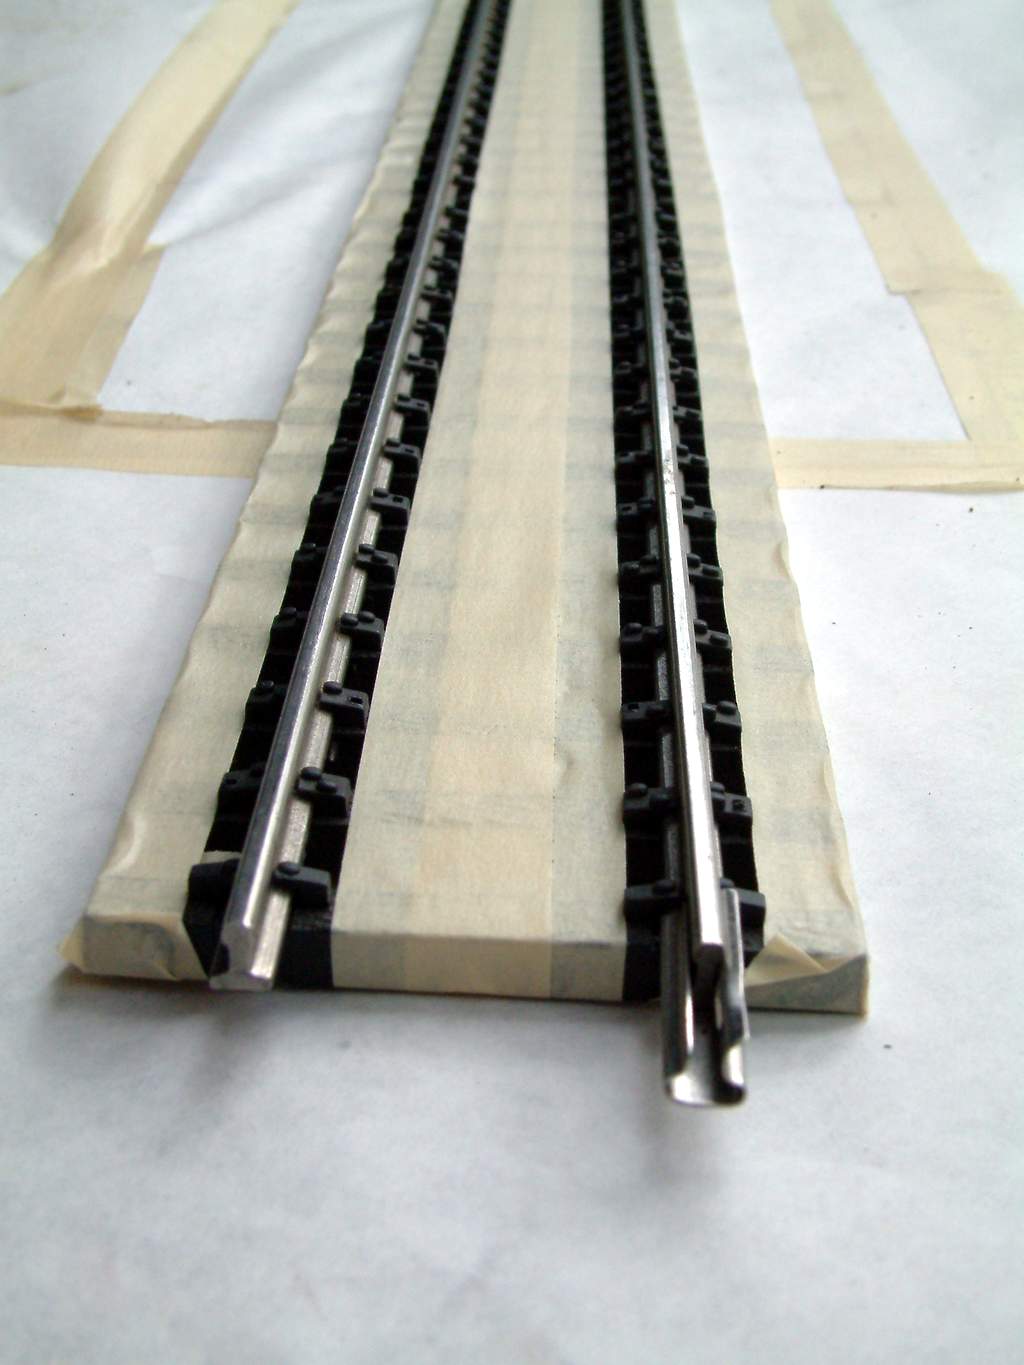
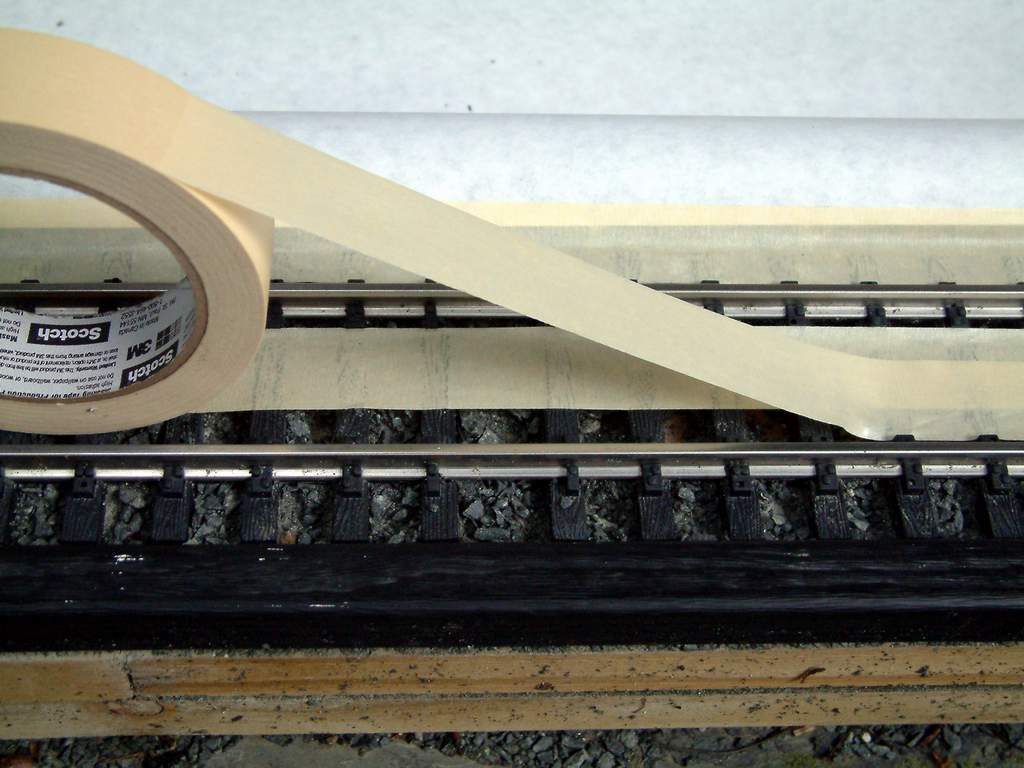
For masking I am using Butcher Paper because I have a roll. You could use newspaper or any other kind of paper that isn't absorbent.

I roll out and cut a length of paper, then run tape down one edge, leaving some adhesive exposed.

The tape and Paper are used outside the rails to cover ballast, bridges or landscape features that you don't want to paint. Butt the tape up tight against the tie plates and press down firmly.

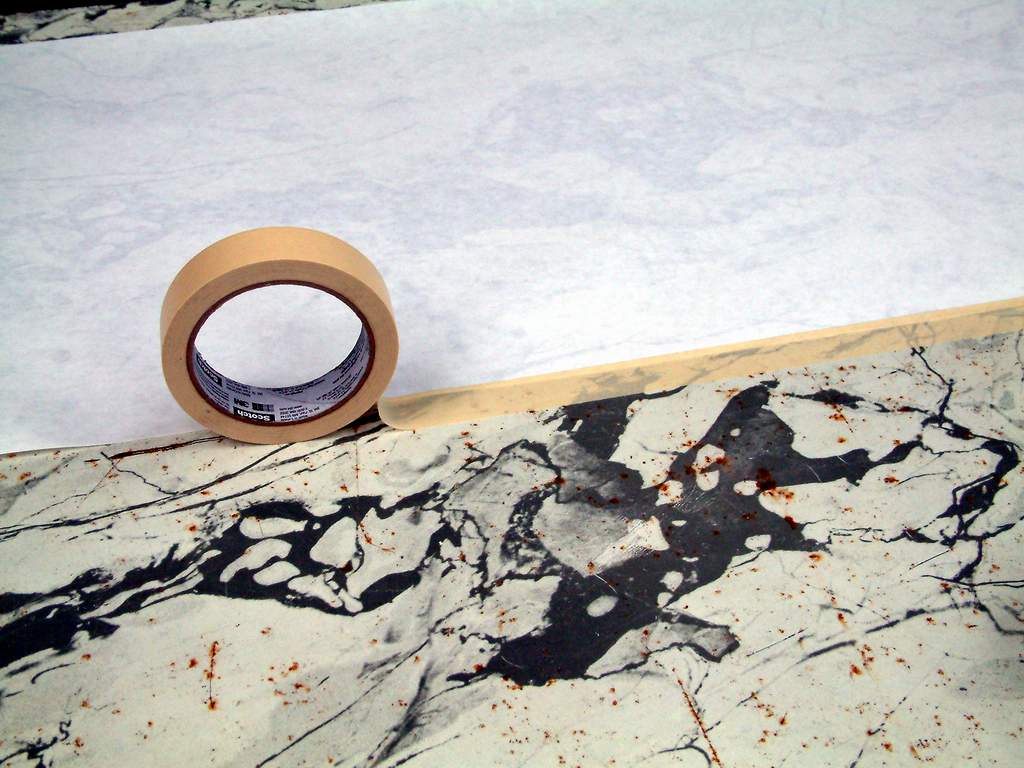
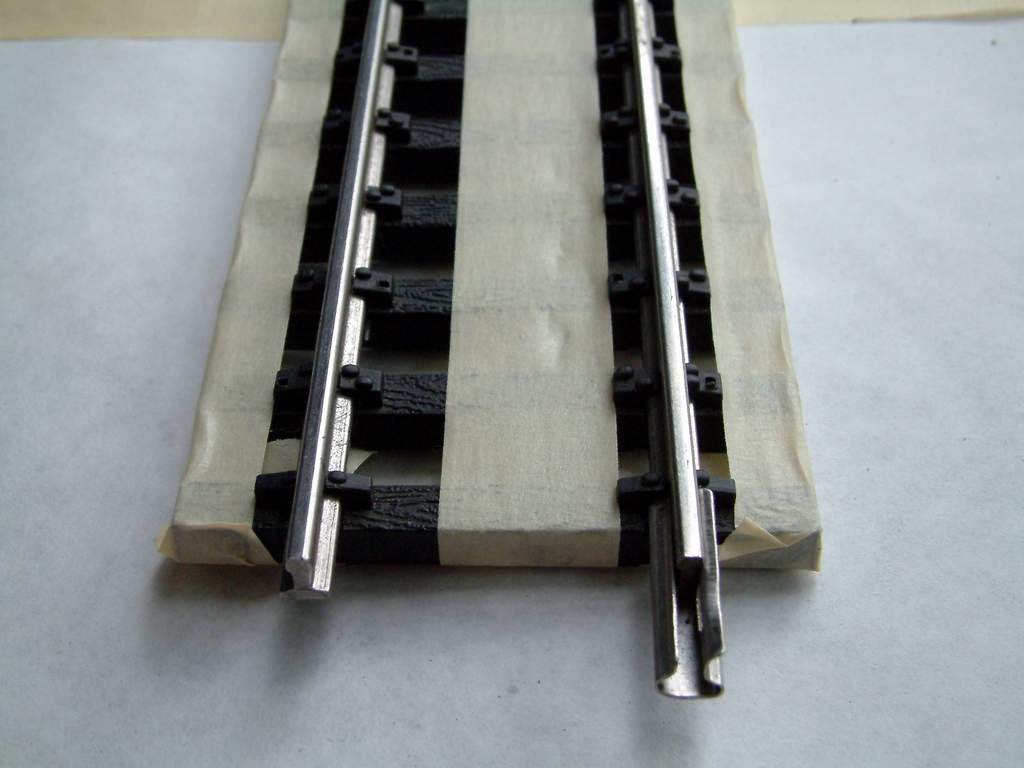
Tape between the rails tape as we did above, using two lengths of tape butted against the tie plates, as shown on the right.

Repeat the Paper/Tape on the outside of the other rail.

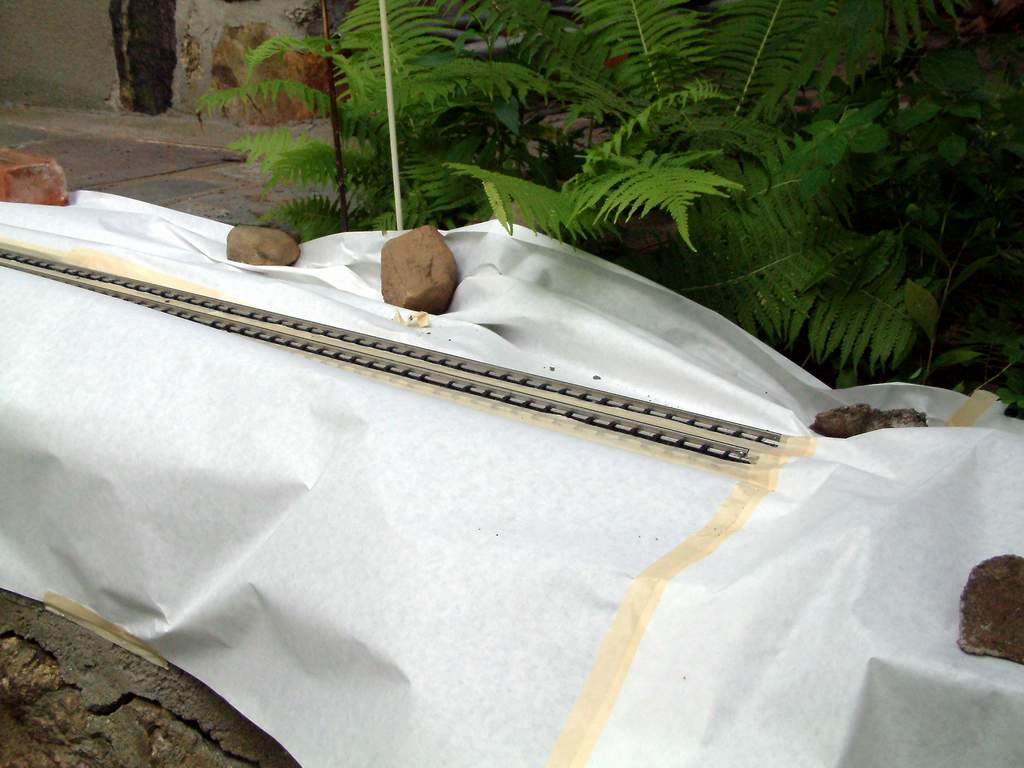
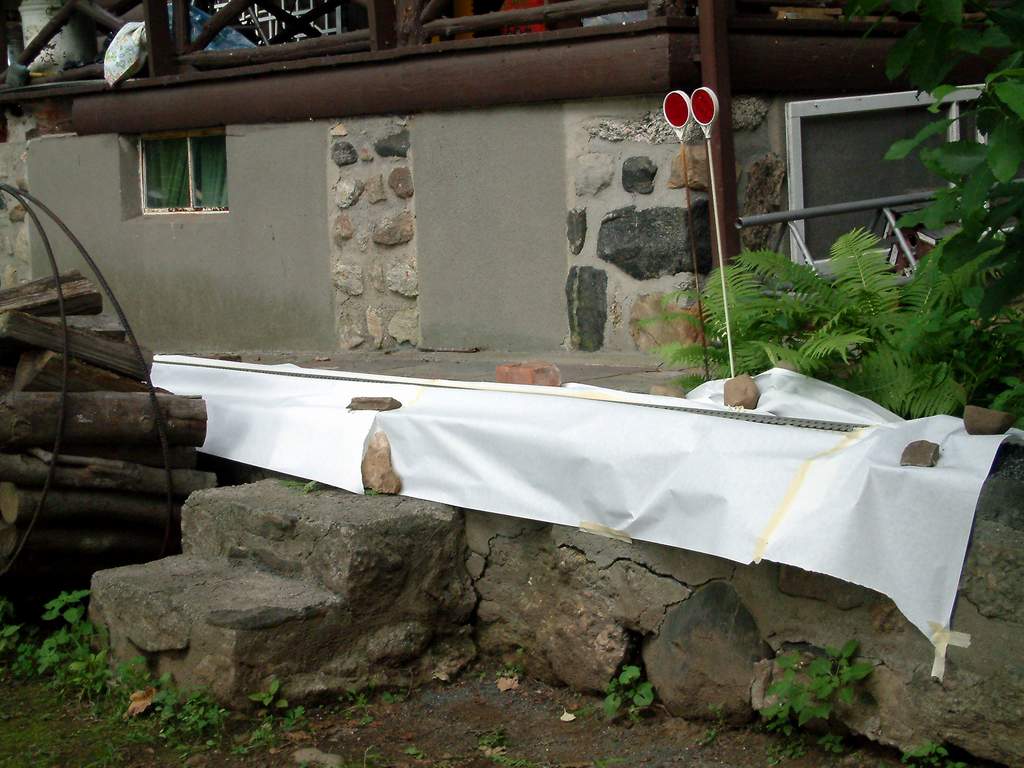
If there is any breeze, put some weight on the paper, and tape down as needed to keep it in place.

I chose to mask a hard line at the end of this section to photograph the before/after. Normally I would mask a foot or so beyond where I was going to stop, and next time just blend with the previous section. 

If you do mask a hard line this the black will be very difficult to match. Similar to painting sections, you will need to blend the joints later.


Apply one even coat of Ruddy Brown Primer along the inside of one rail, then repeat for the outside rail. Paint the other side the same way by going to the other side of the track.

Break the work up into 4-5 foot sections and just blend each section together.

One coat might be enough, but I always do two. After 30 seconds or so, go back and repeat the process for a full second coat.

Apply a spatter coat of Semi-Flat black using the technique in the first section of this tutorial.

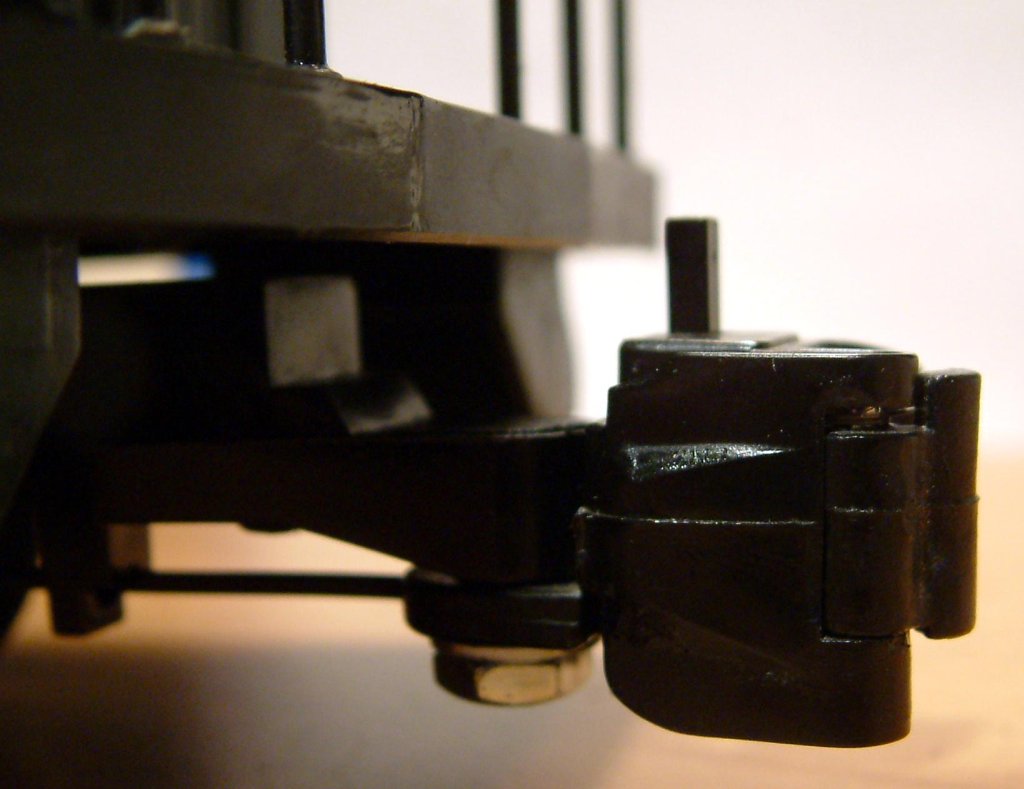
The photo on the right is the result of my ' short burst splatter' technique to simulate oil drips and stains.

Remove the masking as soon as the paint is dry to the touch.

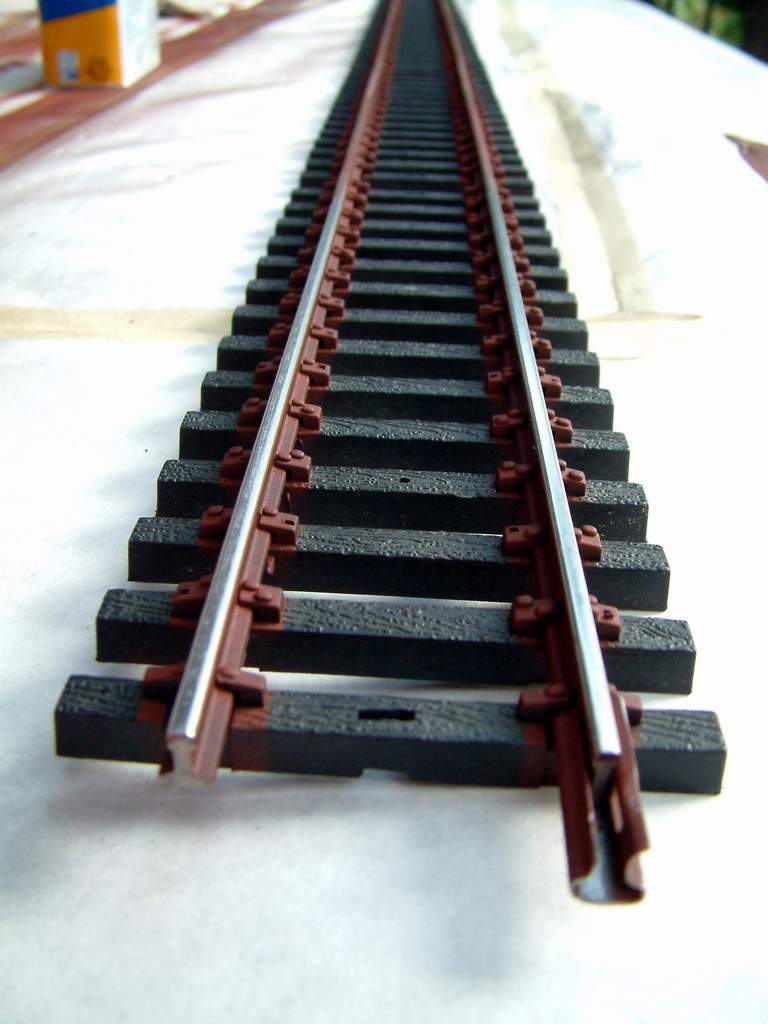
Clean the rail tops with lacquer thinner as described in the first section.

WOW. Doesn't that look one heck-of-a-lot better :]

Don't forget to clean up and put away your tools. I suggest you put away several of your favorite liquid refreshments while enjoying how much you have improved the look of your track.

You may have noticed that this method gets some paint on the ties (and ballast if you paint in-place). I feel that this is a minor trade-off for the simplicity of the masking technique. Most of it will disappear in the ballast and the rest is barely noticeable from a few feet away. But of you are a real rivet counter, it will bother you. In that case you should carefully mask your track, before it is hand laid. You'll have superb looking track when you are done, but I will have been running trains for months while you paint and lay track. 

A big Thank you to Marty Cozad for explaining this method so many moons ago. I hope you can use and enjoy his method on your railroad.

Back to Top


Bachmann Annie Power Mod - A  simple Power Switch Modification for the Bachmann Ten Wheeler

(all versions with the NMRA/Large Scale power Switch).

Most large scale locomotives sold today are equipped with a motor power switch. These switches can come in handy if you need to double up locos on a siding, or just need to stop a loco from moving on powered track.

Unfortunately, the Bachman Annie (10 Wheeler) does not have such a switch, but there is a very easy to do modification that will give you similar functionality. I say "similar" because this mod becomes a master power switch, not just a motor switch because lighting and smoke are wired after the switch. You could change that if you wanted to do a more involved modification.

What makes this mod so simple is a trick I learned myLargescale.com about removing the smoke box cover. This allows access to the wiring of the switches mounted behind the smoke box door without a major disassembly of the loco.

To Open the smokebox (models with Electric style lamp)

1 - Gently remove the headlamp by rocking from side to side and pulling gently up until it pops off.
2 - Remove the two tiny Phillips screws from the headlamp bracket and move the headlamp assembly and bracket to the side.
3 - Locate the small rectangular hole in the boiler under the bracket.
4 - Using a small flat blade screwdriver press down on the plastic tab inside the hole while gently pulling the top of the smokebox cover forward and out of the boiler.
5 - The back side of the smokebox cover with the switches and wiring is now exposed.

This modification is so simple anyone can do it. No soldering is required. You will need a pair of diagonal cutters or a very small pair of scissors.

The top switch on the smokebox cover is the Polarity switch. Bachman decided to allow the user to choose between the polarity that all other Large Scale locos use - or the NMRA Standard. Unless you run all Bachman locos switched to the NMRA Standard you probably have this switch set to Large Scale already.

What we are going to do is cut the two jumper wires that connect to the NMRA side of the polarity switch. These jumper wires are Red and Black. They run from both ends of the switch crossing as they go. I unsoldered mine from the NMRA end of the switch (the end with one wire connected to each terminal) but you can cut them so long as you don't plan to reconnect them in the future.

In the schematic diagram to the right, please note that crossing wires ARE NOT connected.

Once you have cut or unsoldered the jumper wires reverse the disassembly process.

Operation of the polarity switch is now changed. In the Large Scale position the loco will run with track power. In the NMRA position the loco will ignore track power. I have relabeled my loco ON and OFF.

I hope you find this modification as useful as I have.  Back to Top


Bachmann Coupler Mod - A variation on TOC's simple method to improve Bachmann coupler reliability.

Over in a myLargescale.com Forum thread, TOC mentioned how he fixes Bachmann couplers with a simple modification. I tried a variation of his idea and it greatly improves the reliability of the Bachmann Couplers on my road. My modified cars can now be run at the head end of long (15-20 car) trains with no uncoupling experienced. I was so happy with the results that I decided to document it here with photos and share TOC's ideas along with my variation in a format that is simple to understand and apply.


TOC's method is to replace the plastic pin at the pivot point with a 1/2" #4 pan-head sheet metal screw and flat washer driven up from the bottom through a #50 hole drilled in the truck tang... quote:


Originally posted by Curmudgeon


Occasionally I get a Bachmann that has a problem.
But, the mods I do to all fixes the vast majority of unwanted uncouplings.
I replace the push-pin at the pivot with a #4 screw and a flat washer, removing the half-collar and filing flush with the coupler shank....
TOC


Rather than use the sheet metal screw, I decided to use a 3/8" 6-32 machine screw, nut and flat washer, with the screw head hidden in the coupler pocket. Both methods require some minor trimming of the coupler pocket, which I will detail below. The result of either fastener is to reduce the slop and droop in the coupler head at the pivot point, thus reducing uncoupling due to load stress.

On each of the following images you may click them for a Super Size image (1024 pixel wide - aprox. 100K).


Side and Bottom View of Truck Mounted Bachmann Coupler. Note the plastic pin at the pivot point.
First, Remove the coupler from the truck and locate the underside of the plastic pin at the pivot point.

Squeeze the slot in the pin with pliers from the underside and push through the coupler shank to remove.

Remove the plastic pin and the coupler head. Note the half collar on the coupler pocket.
Trim off the half collar and any excess on the coupler pocket so that  the collar is flush with the coupler shank as shown at left.
Ready the parts for assembly: 1 ea. 6-32 x 3/8 inch Machine Screw, Nut and Flat Washer. I use Locktite brand Threadlocker to hold the nut in place.  

Push a 6-32 x 3/8" machine screw down through the collar hole from the top of the coupler pocket until the threads are exposed as shown at right.

Place the coupler shank back over the coupler pocket collar. Be sure the coupler head is oriented as shown.  The fat end of the lift pin should be up when the threads of the screw are visible. 
Install the Flat Washer. Coat the threads lightly with Threadlocker then install the Nut. To be sure the screw head is seated in the coupler pocket, screw the nut on tight, then back off checking the head pivot until there is only slight resistance. When properly adjusted the coupler head pivots with very light resistance. 
Add a drop of Threadlocker on top to help hold the Nut in place and replace the coupler assembly on the truck.

This completes the modification for Freight Cars.

Installing the modification in Passenger Car trucks requires an extra step. Note the Collar on the end of the Coupler Tang in the left picture. This collar must be removed by trimming the Coupler Tang on the truck as shown on the right.
When the Coupler Tang is properly trimmed, the mod works equally as well on Passenger Cars.
I want to add a special Thank You to Dave Goodson (aka The Old Curmudgeon -or- TOC) for developing the original idea for the modification and his quick response to my email questions.

Once this mod is installed on your Bachmann Couplers you should experience no uncoupling problems due to coupler droop.

Back to Top