The only components remaining are the power switch and the radio. I experimented with mounting the power switch to the wood rack. This worked well, but didn't look very good. I noticed that the handle of the switch was drilled for a control rod. I enlarged the hole slightly to fit the brass rod I had on-hand. The rod allows me to hide the switch with the radio inside a wood load.
I was inspired by some "scale wood" in a photos posted in a LSC Thread by John Bouck. John explained that the wood was Maple branches cut and split with a chisel. I immediately went to the back yard searching for Maple branches both dead (fallen) and live. I picked up and pruned off enough branches to create enough split wood to fill a Delton hopper. The cuts were done on a band saw then split in quarters with a small chisel. I found that the bark on live branches holds on much better. I was able to cut and split dead ones, but the bark comes off easily.
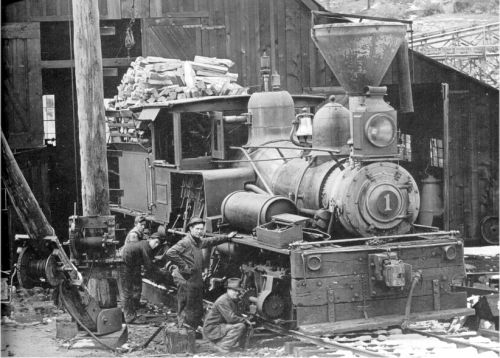
With a supply of wood ready for the load, I went searching for pictures to see how prototypes loaded wood. Did they stack it neatly, or just dump it in the rack? Since wood was abandoned as a locomotive fuel very long ago, there just aren't that many pictures on the internet to choose from. The best one I saw was posted on LSC Chat by Gary Buchanan. [Sorry - No Enlargement Available]
That's one heck of a wood pile! The conclusion drawn from looking at every photo I could find: wood was always stacked, but the stacking patterns were as individual as locos and fireman. Usually the pile looks like it's ready to fall off at any minute.
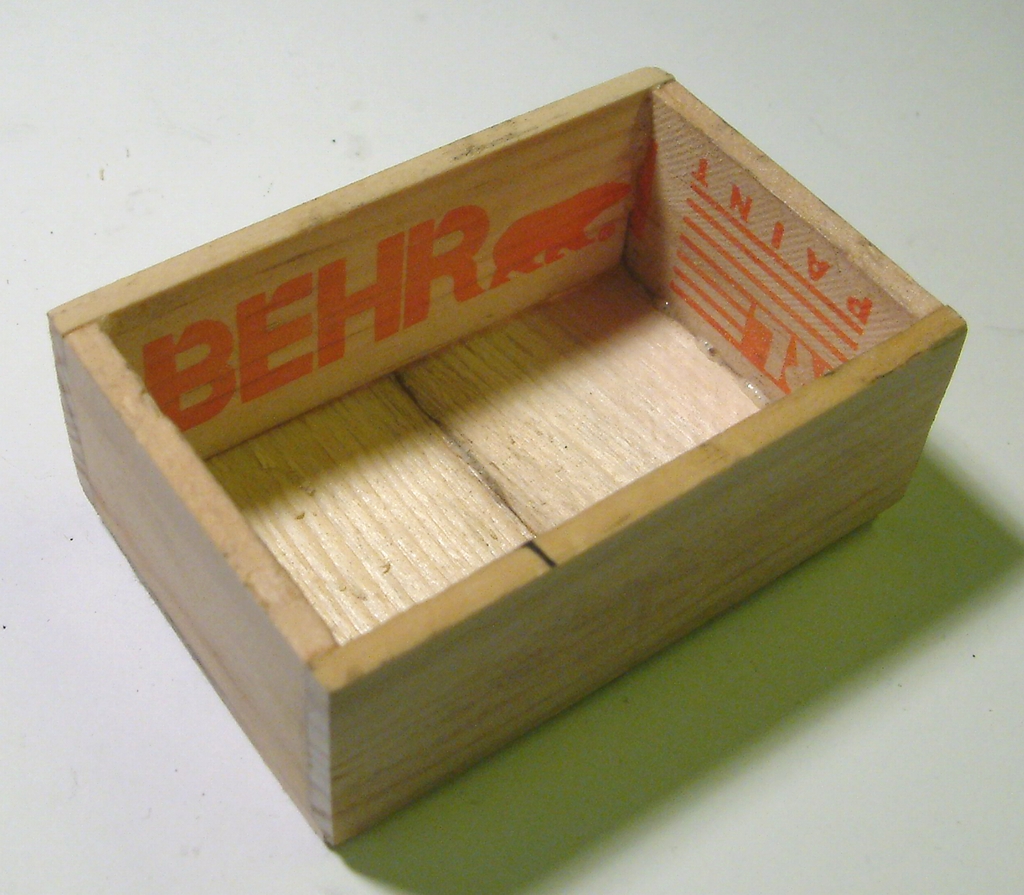
To construct a dummy wood load, with open space inside, I chose to build a small wooden box to support the real split wood. Looking in my scrap box I found some paint stirrers from HoDePo that were just the right height and some more wood that I seamed together to make a top. I tried Gorilla Glue for assembling this box and was very happy with it. Here's an inside view of the box. [Click to Enlarge]
And here's the top. [Click to Enlarge]

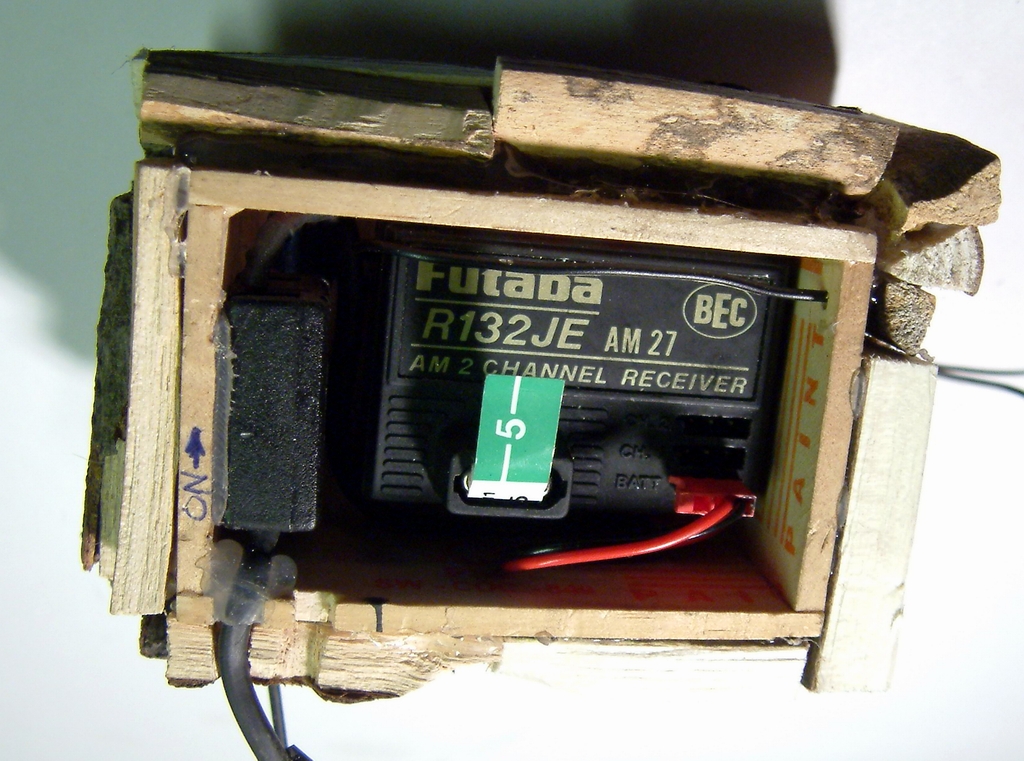
Next I stuffed the power switch and radio inside the box. Both are held in place with hot glue. I'm hoping that they are far enough from the hot metal surfaces that the glue won't melt. I did not want to use a more permanent glue since I plan to upgrade this radio system someday. You can just see the black rod protruding through the box under the wire, that's the on/off switch. This photo is a little out of sequence with this article. It was taken after the wood load was built on top of the box. [Click to Enlarge]
The final step is to actually create the wood load and attach it to the radio box. The wood needs to be attached to the box so that the load and radio can be easily removed to access the batteries. There is no provision in this installation for charging the batteries in-place. A charging system is on the wish list.
In the final chapter I'll show you the finished wood load and the assembled system.